Monday, January 25, 2016

Week 3 (1/18-22) Batterey Box Re-Wire

Long story short, the battery box on our lift truck caught fire. The glow plug relay was the start of the fire and it spread to other components within the compartment which ultimately fueled it's demise. I was lucky enough to be trusted to re-wire the compartment. Luckily, we had the electrical schematic in the shop. After a LOT of clean up, splicing, heat shrinking, crimping, and zip-tying, the equipment is fully functional again. 


Here is the schematic. My confusion is how did the relay build up enough heat to catch fire but not draw enough to blow the fuse. My theory is that they bumped the emergency stop button (a VERY common thing to happen) and spent the usual 10-20 minutes trying to start it. By clicking on the ignition, the timer relay kicks into effect and only stays on for a preset time. Could a repeating of this process of on/off/on/off/on/off cause enough heat for it to catch fire? It would make sense that no more than 50amps are getting through, and if this timer relay is exposed to an extended period of voltage/amperage, could it truly catch fire or am I going down the wrong rabbit hole?

Some new ends I installed. Heat shrinking water proof hardware is just the best.

Hours: 40
Running total for Fall: 120

Week 2 (1/11-15) Fuel Level Sending Unit

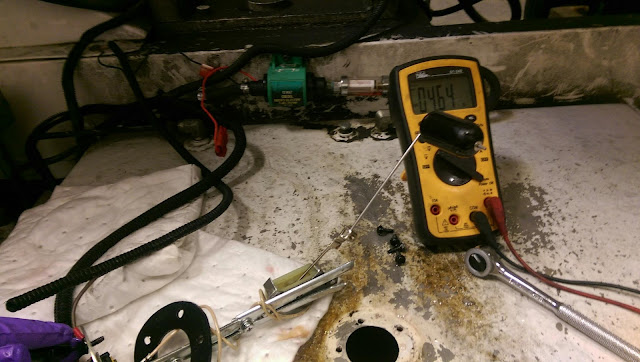
We had a complaint of a fuel gauge not working appropriately on one of our pieces of equipment at the airport. Once we got it into the shop I grabbed the shops trusty multi-meter. We had an appropriate supply to the sending unit as well as a sufficient ground. I then started the task of removing the sending unit to investigate it further. It was simply a variable resistor attached to an arm with a flotation device on the end. I hooked up the test leads to the sending unit to find that the resistor was working properly; you could even watch the fuel gauge rise and fall correctly by moving the arm. I realized that the sending unit was not installed properly, the arm rubbing on the baffle inside of the tank and had gotten stuck this time around. So, after making a few adjustments to the mounting bracket, the gauge works just fine now. 

Hours for the week: 40
Running total for Winter: 80

Sunday, January 10, 2016

Week 1 (1/4-8) Axle Nut Removal "Tool"

This first week we had a piece of equipment in for a routine PM. We lifted the front end and checked for play in the front wheels and found quite a bit of slop. After removing the wheel and cap we found an axle nut that was 2 1/2" in diameter. We did not have the right tool to remove it, but we decided to look around the shop before we gave up and drove to Napa to buy the socket. We found an old steel seat bracket in the "bone bucket" and decided to grab the angle grinder and the almighty welder. We came up with the most simple yet effective design, made our measurements, ground down the edges, and it worked perfectly. Yes, it does have the appearance of roadkill, but it got the job done in half the time of driving to Napa and costed the shop practically nothing. 

In the end we found the bearing was shot as the seal had been compromised and the water damage was too severe.

Scrap metal should never just be tossed. It can be very useful 
Ain't it pretty? 

Some hi-tech shenanigans.

Shop Hours: 40
Total for Fall Quarter: 40